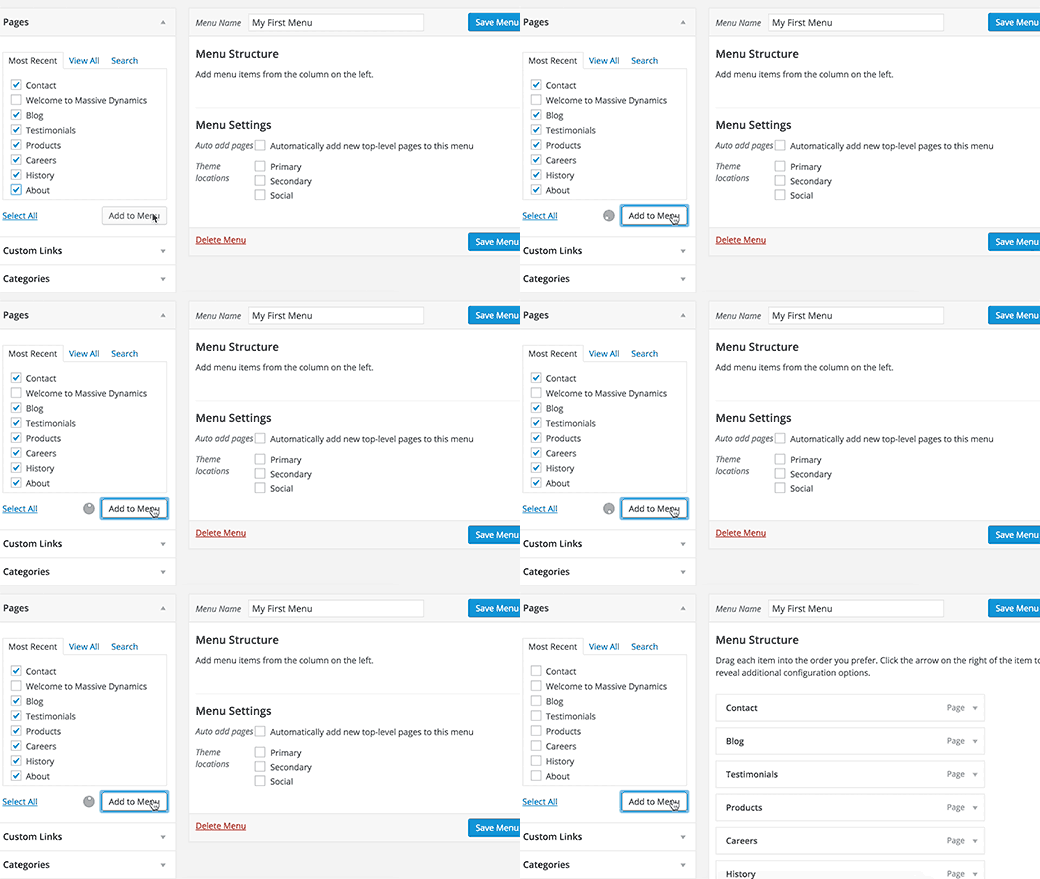
To create a new menu, go to Appearance > Menus, then click Create a new menu > fill your menu name > click Create Menu. Add to menu the item you want to add on the left hand boxes, then click Save Menu.
Create a new menu
Step 1 – Start by navigating to the menu manager under Appearance → Menus.
Step 2 – Under the “Edit Menus” tab, you’ll see a “create a new menu” link. Name your menu with something useful such as “Main Menu” and then click the “Create Menu” button to begin adding items.
Step 3 – Now, let’s add some menu items.
Step 4 – On the left hand side of the screen you’ll see a box containing all of your Pages, Categories, etc.
- First, select a few items to be included in your menu.
- Click the Add to Menu button and the items are added to your menu.
Step 5 – Go ahead and click “Save Menu” anytime you change something. If you navigate away from the menus page before saving, all your menu settings could be lost.

Adding & Organizing Menu Items
You can add pages, posts, links and categories in the navigation menu by navigating to Appearance > Menus.
- Page: Click the Pages dropdown heading. The pages you’ve created will be listed below. Check the box next to the page you’d like to add to your menu and click Add to menu.
- Post: Click the Post dropdown heading. The post you’ve created will be listed under dropdown heading. Check the box next to the post you’d like to add to your menu and click Add to menu.
- Link: Select the Custom Link dropdown menu. Enter your homepage’s URL into the field box and give it a title (such as ‘Home’) and click Add to Menu.
- Category: Select the Categories dropdown menu and then you will see the category listed.Check the box next to your desired category and click Add to Menu.
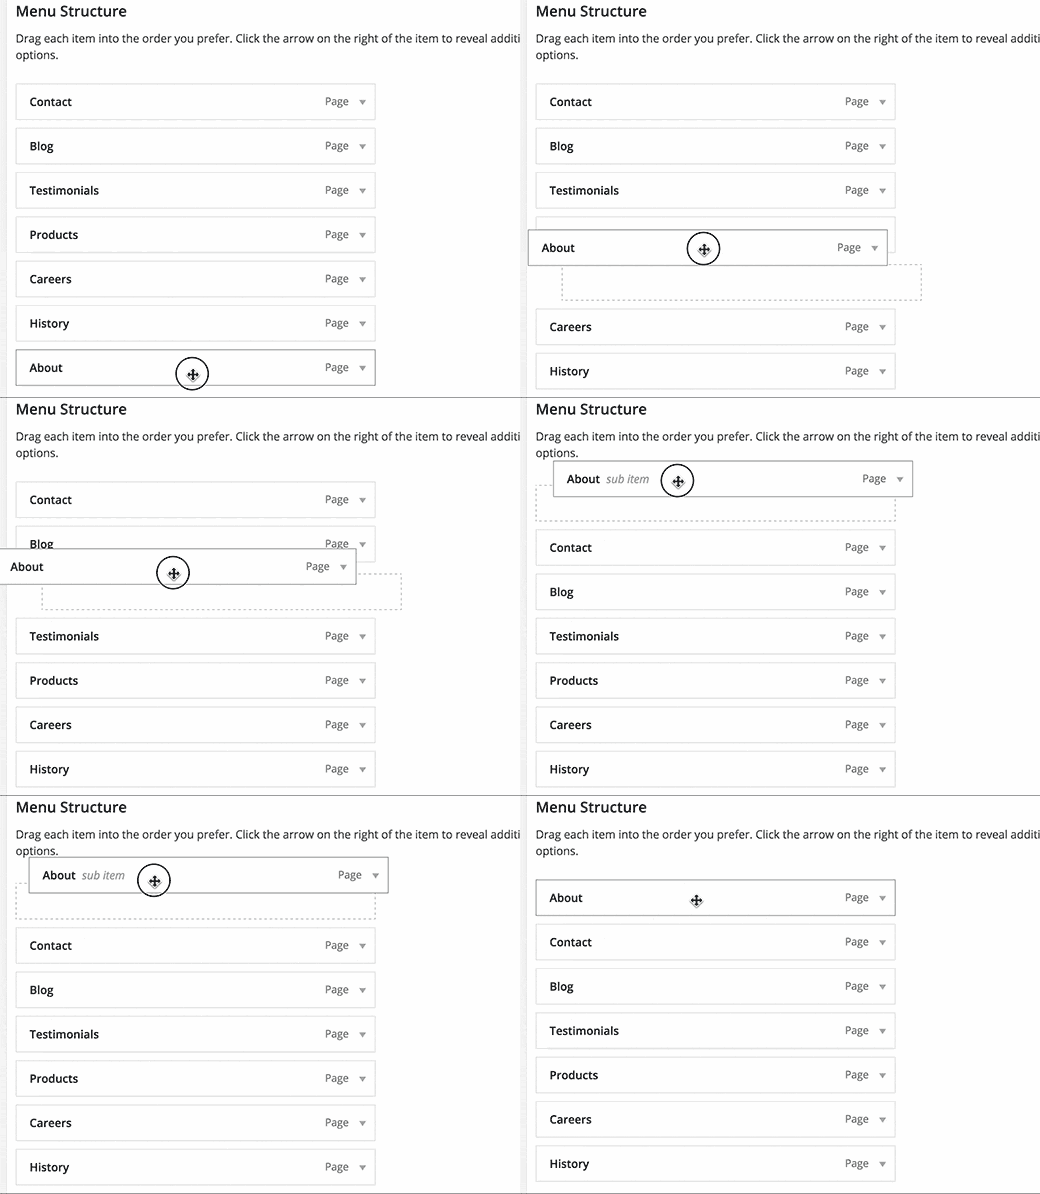
The selected item should now appear under ‘Menu Structure’ column. You can drag and drop the items that you’ve added to adjust its location in the menu. You can also create submenus by dragging and dropping a menu item underneath another so that it’s indented. Be sure to click Save Menu button after.

