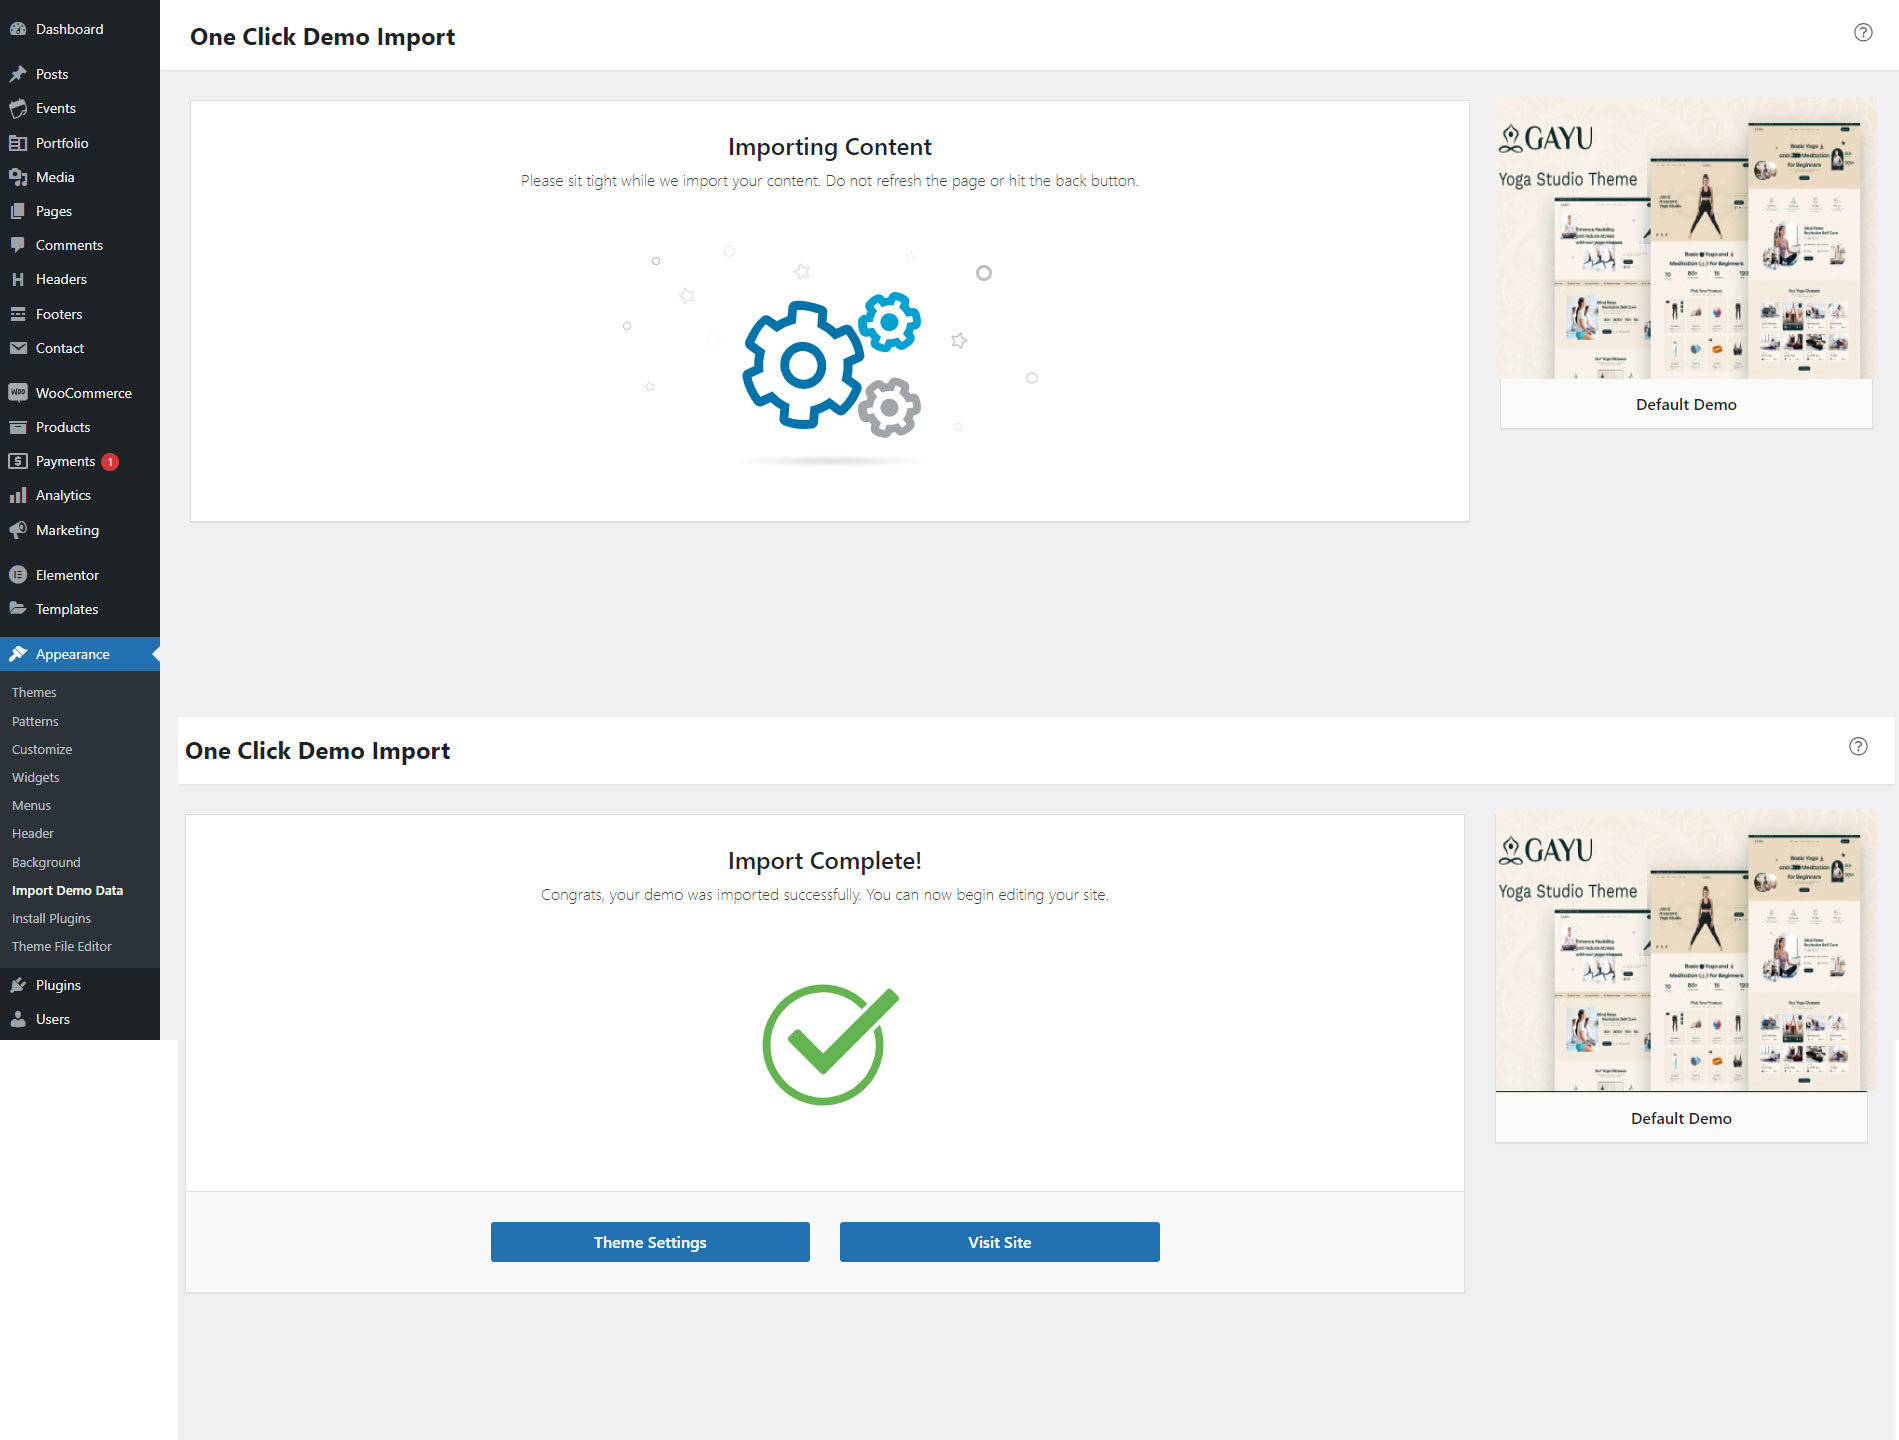
After purchasing the theme, download the gayu.zip , gayu-child.zip and plugins-bundle.zip files from ThemeForest.
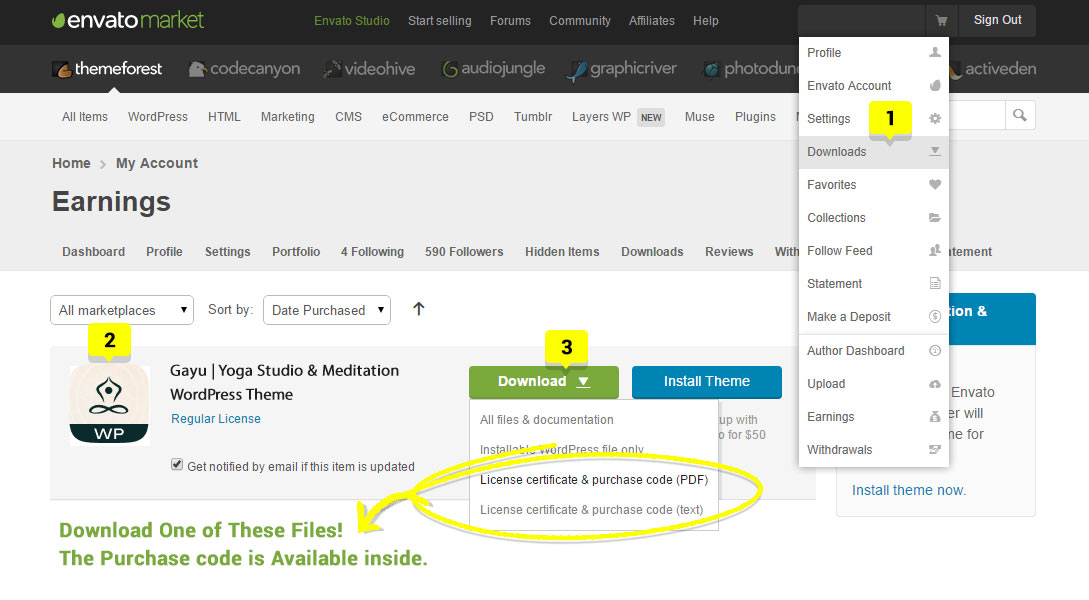
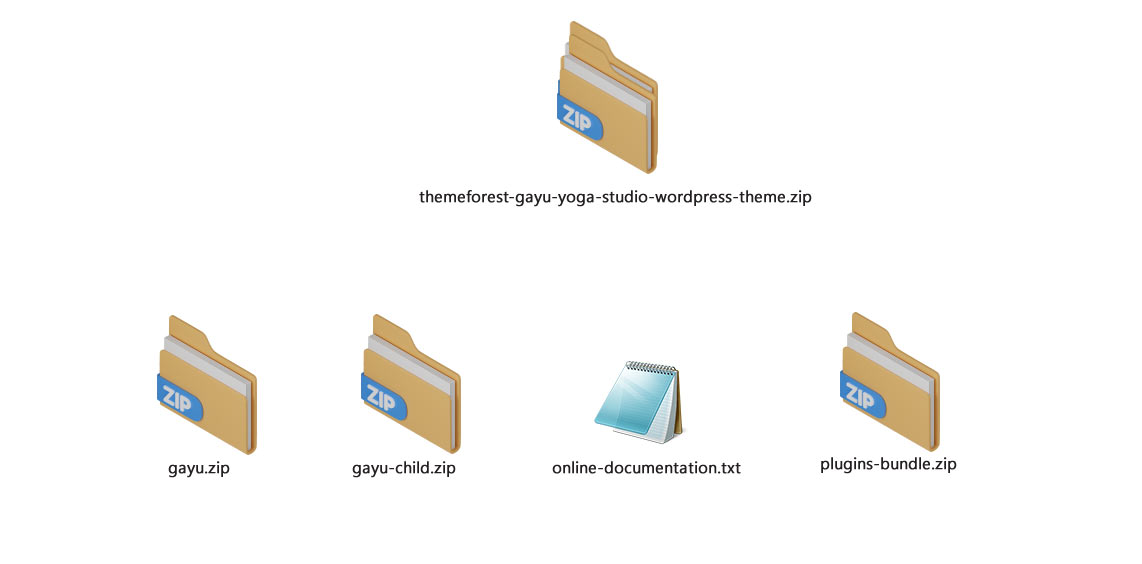
Step 1: Installing a Theme
- Log in to your WordPress dashboard.
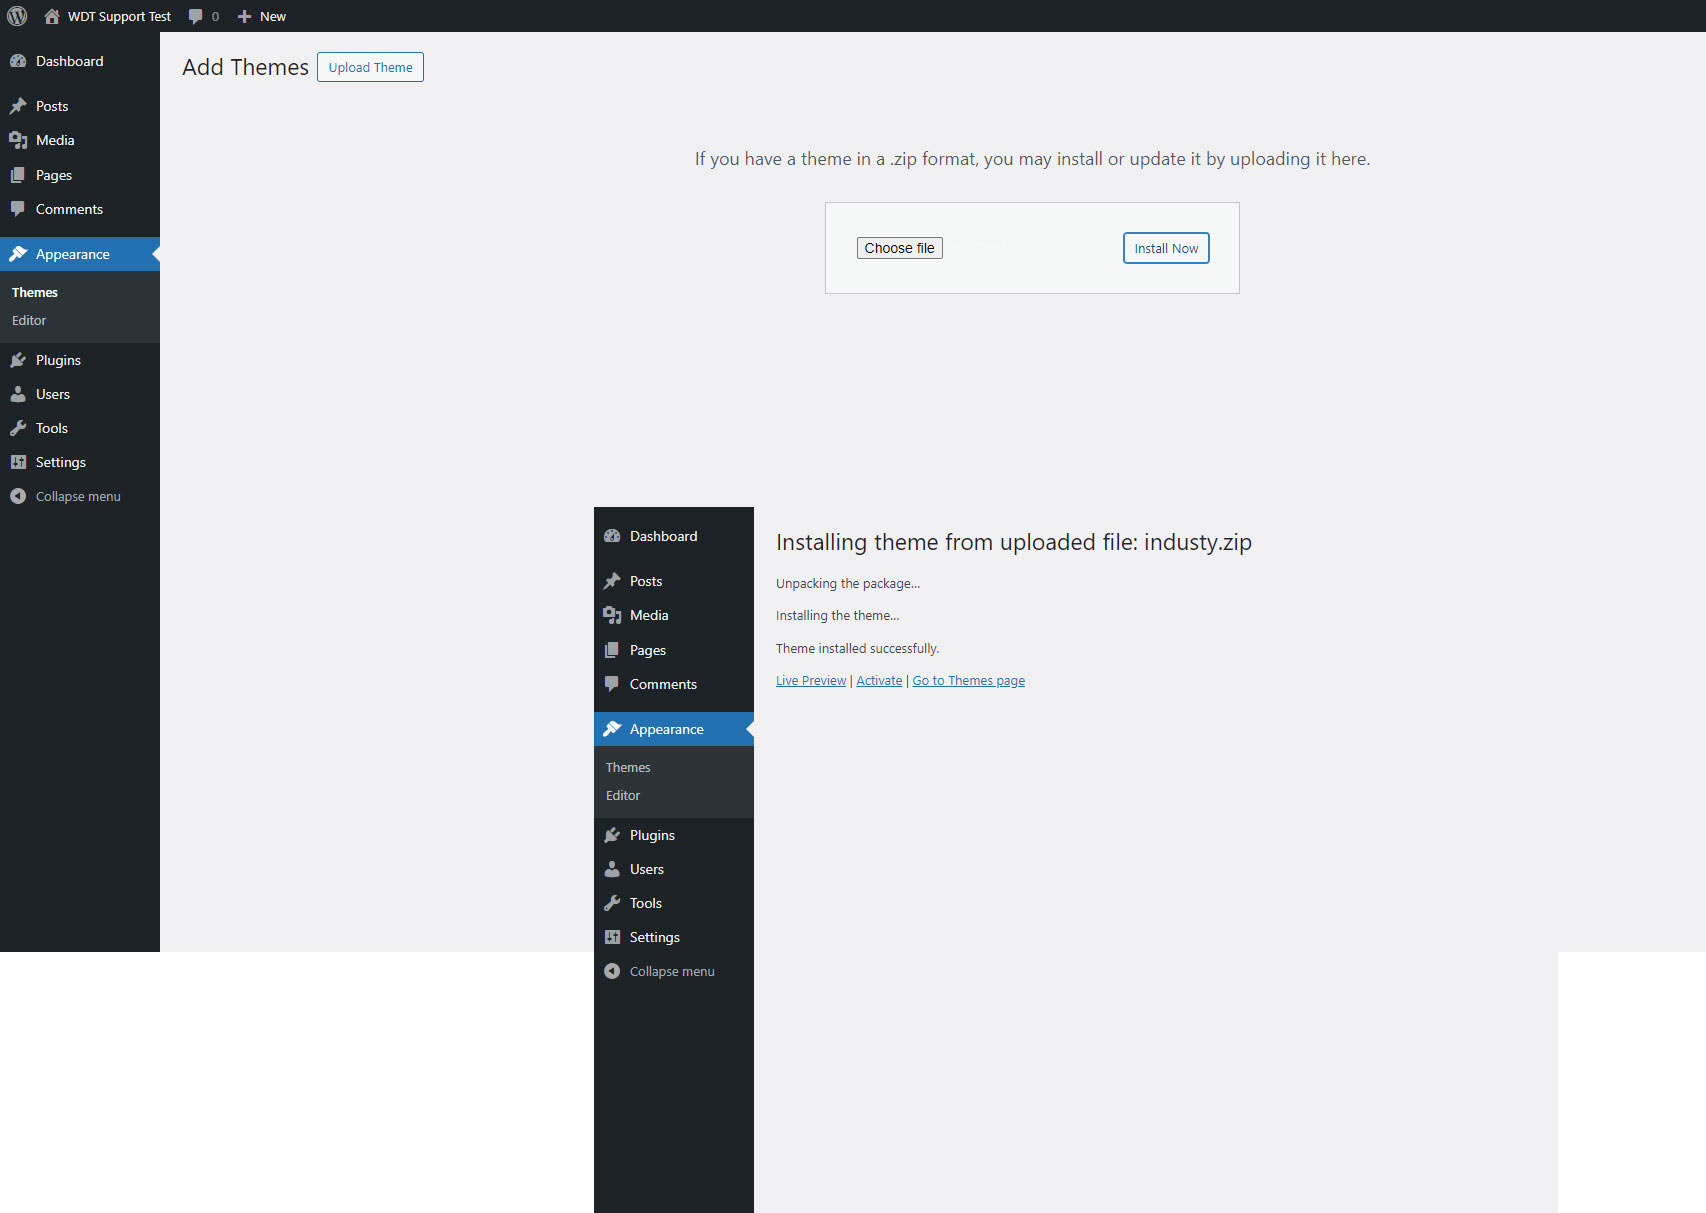
- Go to Appearance > Themes.
- Click the Add New button at the top.
- Click Upload Theme, choose the file from your computer, and then click Install Now.
- After the theme is installed, click Activate to apply it to your site..
Installing a Plugin
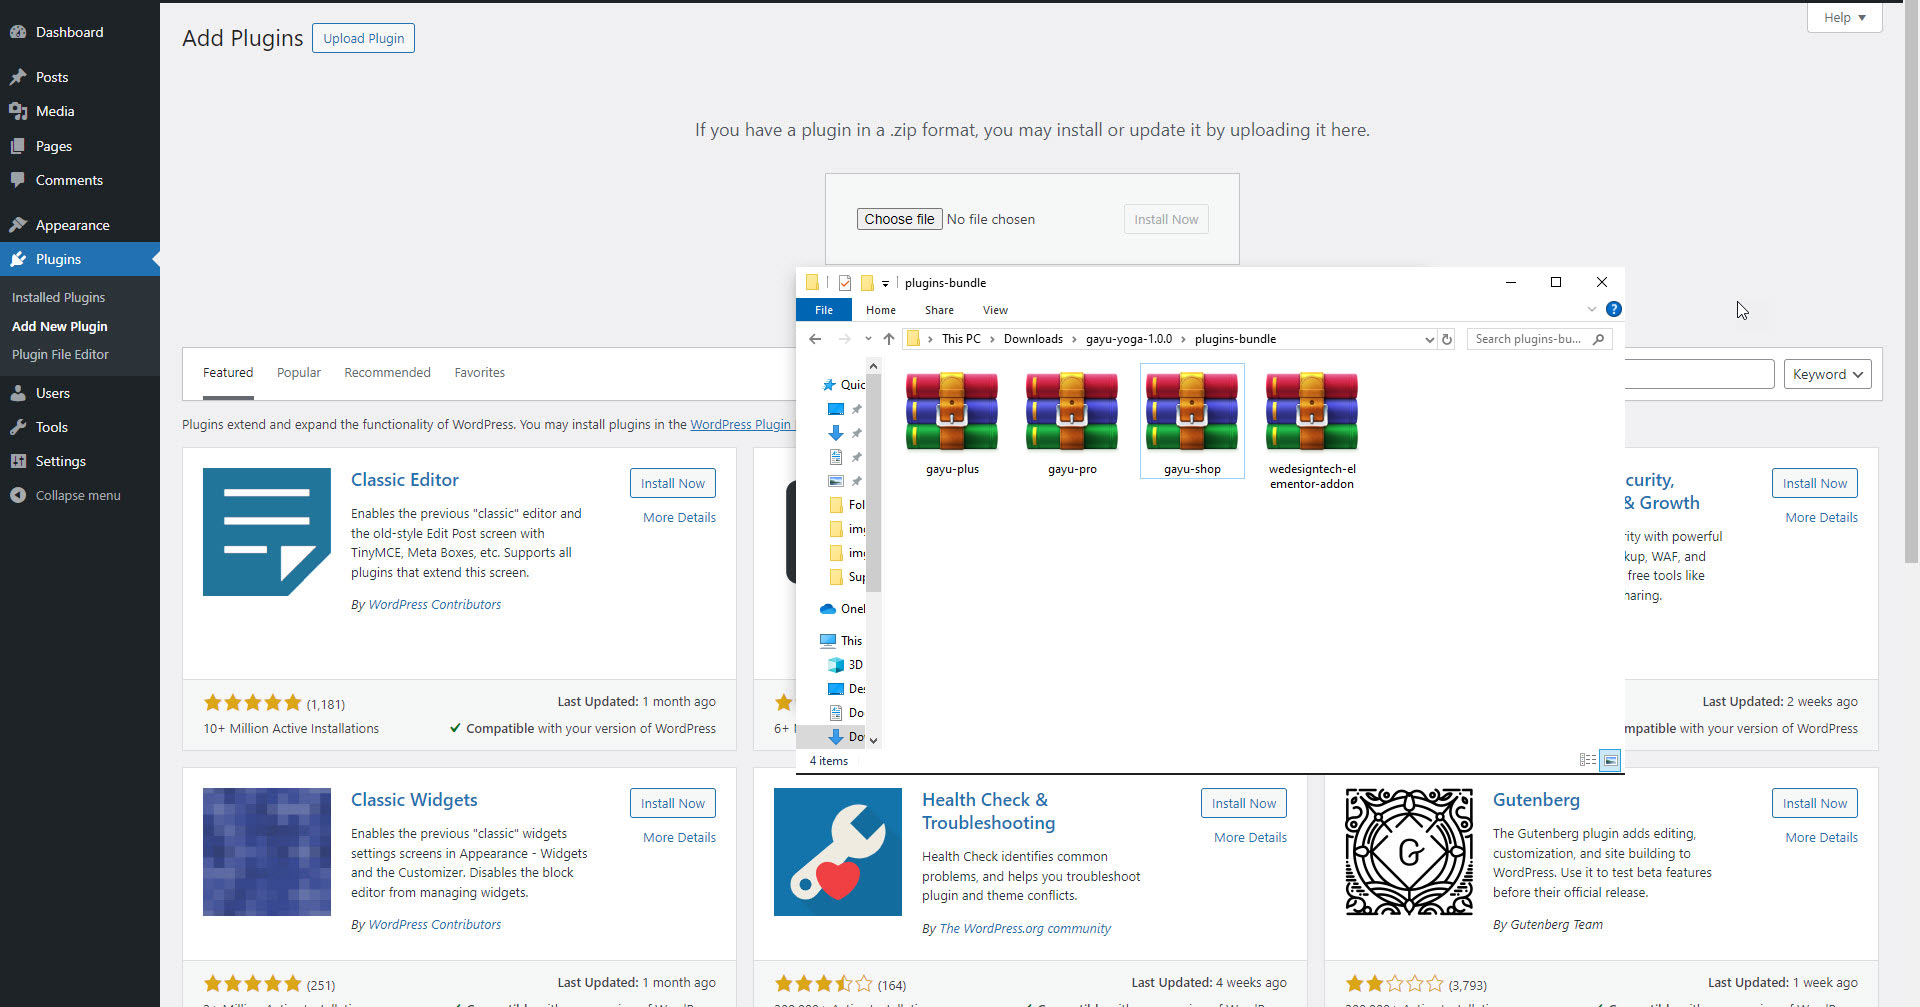
Step 1 : Navigate to the Plugins Section in your WordPress Dashboard : In the left sidebar, click on “Plugins”. Next, click on the “Add New Plugin” to proceed
Step 2 : Upload a Plugin: At the top of the page, click the “Upload Plugin” button.
Step 3 : Choose and Install the Plugin File: Click “Choose File” and select the .zip file of the plugin you want to upload from the extracted folder of bundle-plugins.zip file (e.g., Gayu Plus, Gayu Pro, Gayu Shop, WeDesignTech Elementor Addon).
Step 4 : Once selected, click “Install Now”.
Step 5 : Activate the Plugin: After the installation is completed, you’ll see a success message.
Click “Activate Plugin” to enable it.
Step 6 : Additional Plugins: To install plugins from the WordPress repository, search for the plugin by name, click Install Now, and then Activate after the installation.
Step 3: Importing Demo Content
- Install and activate the One-Click Demo Import plugin.
- Navigate to Appearance > Import Demo Data.
- Choose the demo you want to import and click the Import button.
Wait for the import process to complete. This might take a few minutes depending on the amount of content.

