Important: You have purchased a WordPress theme, and not the example content as seen in the theme demo. You are more than welcome to import the example content into your site to help you get going, but the images can not be used on a live site, nor redistributed.
Import WordPress XML Contents
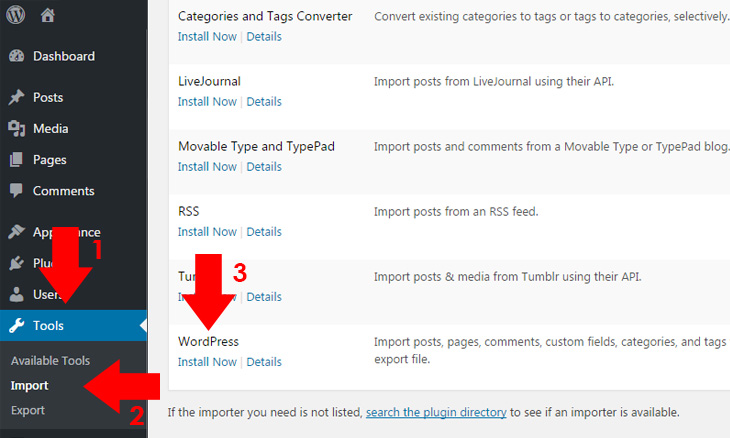
Step 1 : Login to your WordPress dashboard, and navigate to Tools Import. If the WordPress Importer is not yet installed, click Install Now.

Step 2 : At the bottom part of the WordPress dashboard, click Run Importer under WordPress row. You will be redirected to WordPress Import screen.
Step 3 : Click Choose File and browse for the .xml file you have previously downloaded.
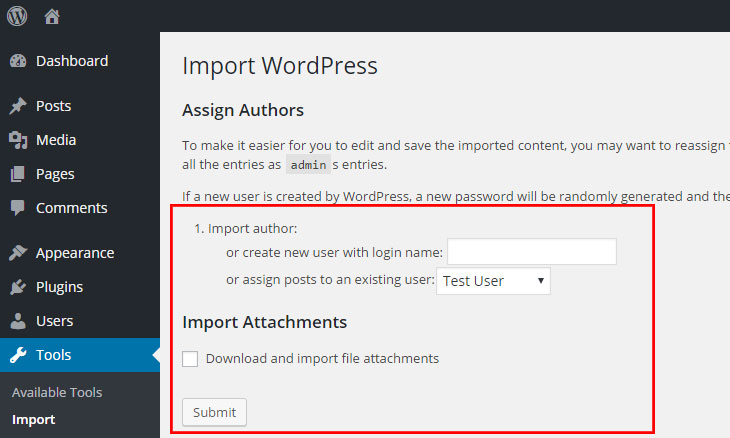
Step 4 : Click Upload file and import, and assign an author if you need to assign different author on it, then click Submit.

Step 5 : Wait for the importer to finish the import. In some cases, with a large file of import, errors could emerge due to its large amount of import. To prevent this, you must unchecked Download and import file attachments before submitting your preferences. Doing this will link the media file from the import source, so it means, if it doesn’t exist (import source site), your site won’t show media file. It’s only good for web hosting migration, but you should remain it checked if the existing import source in running or you have already place the previous media file to wp-contents uploads as stated above. To be sure, you should always backup site contents using FTP.
