How to import demo content using the One-Click demo import
Here’s how you can import the entire theme demo content the quickest way possible, and utilize the one-click demo import feature:
How To Import Demos
Step 1: Log in to your WordPress website.
Step 2:Install and activate your theme.
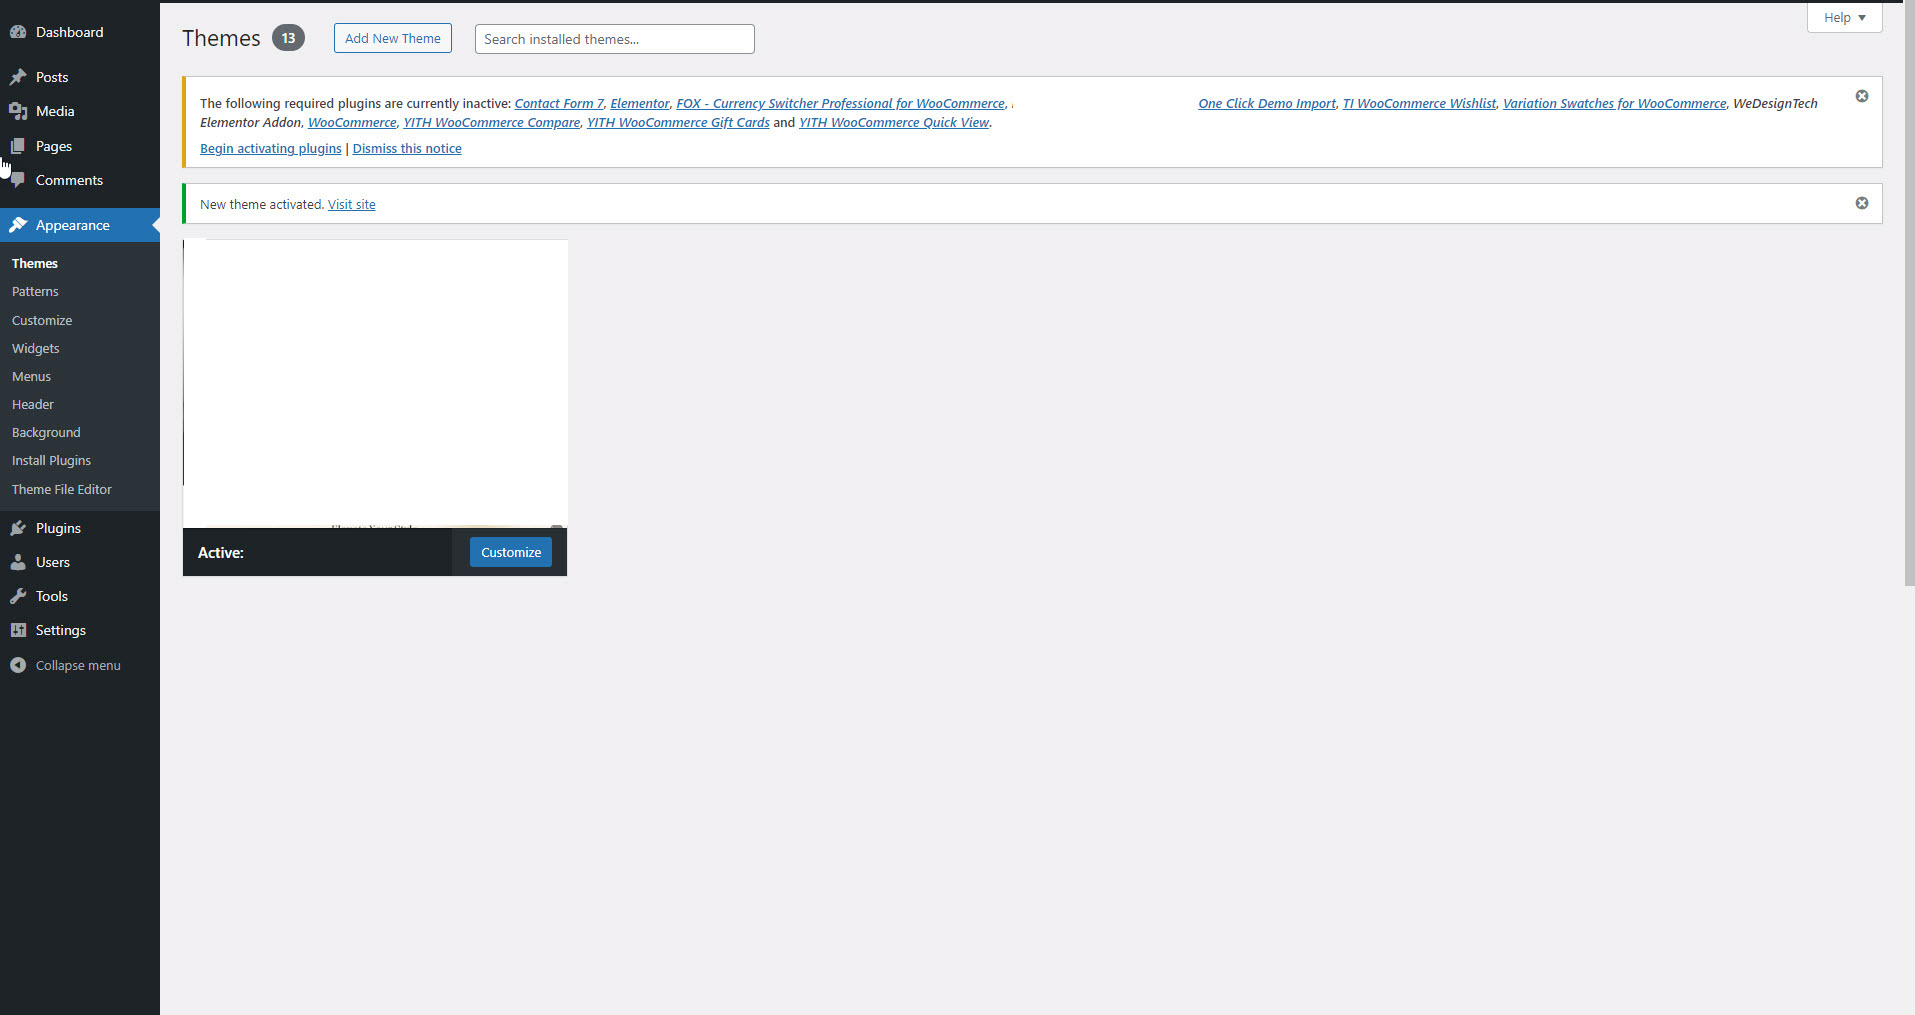
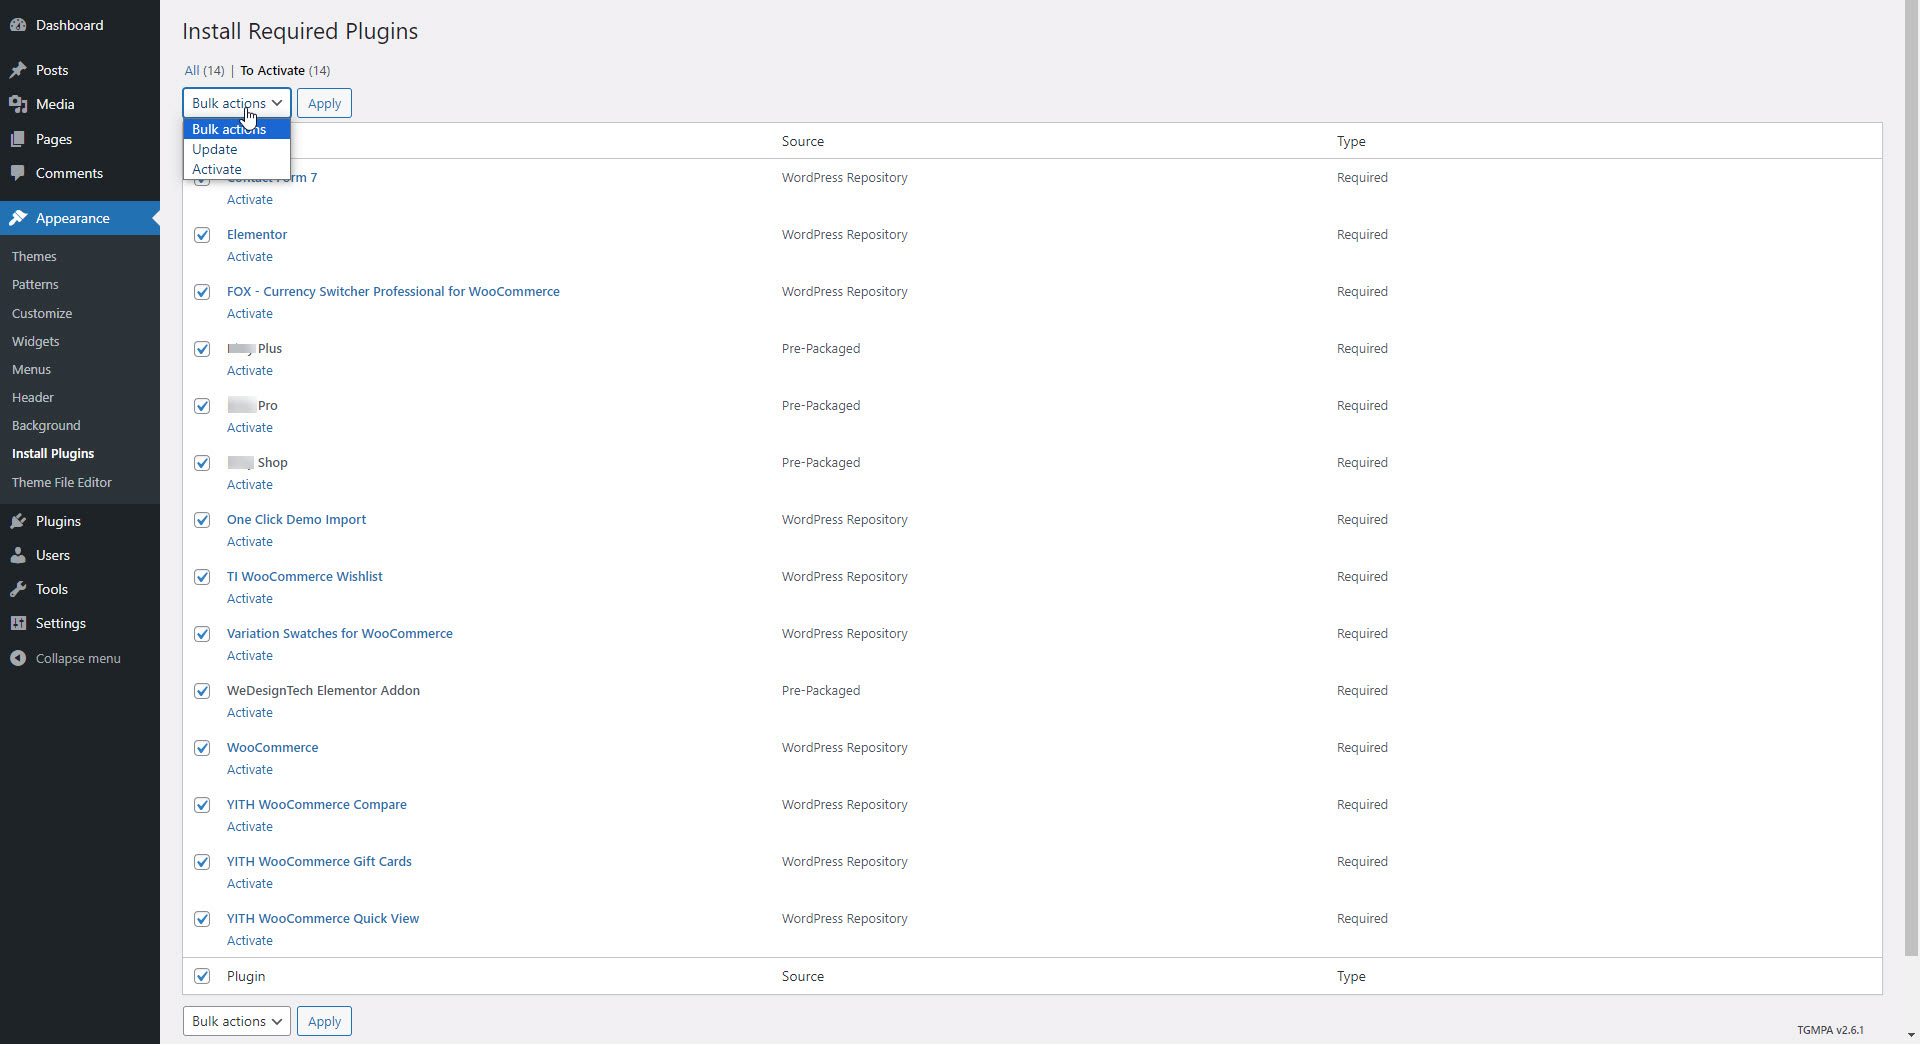
Step 3: Install and activate required plugins.
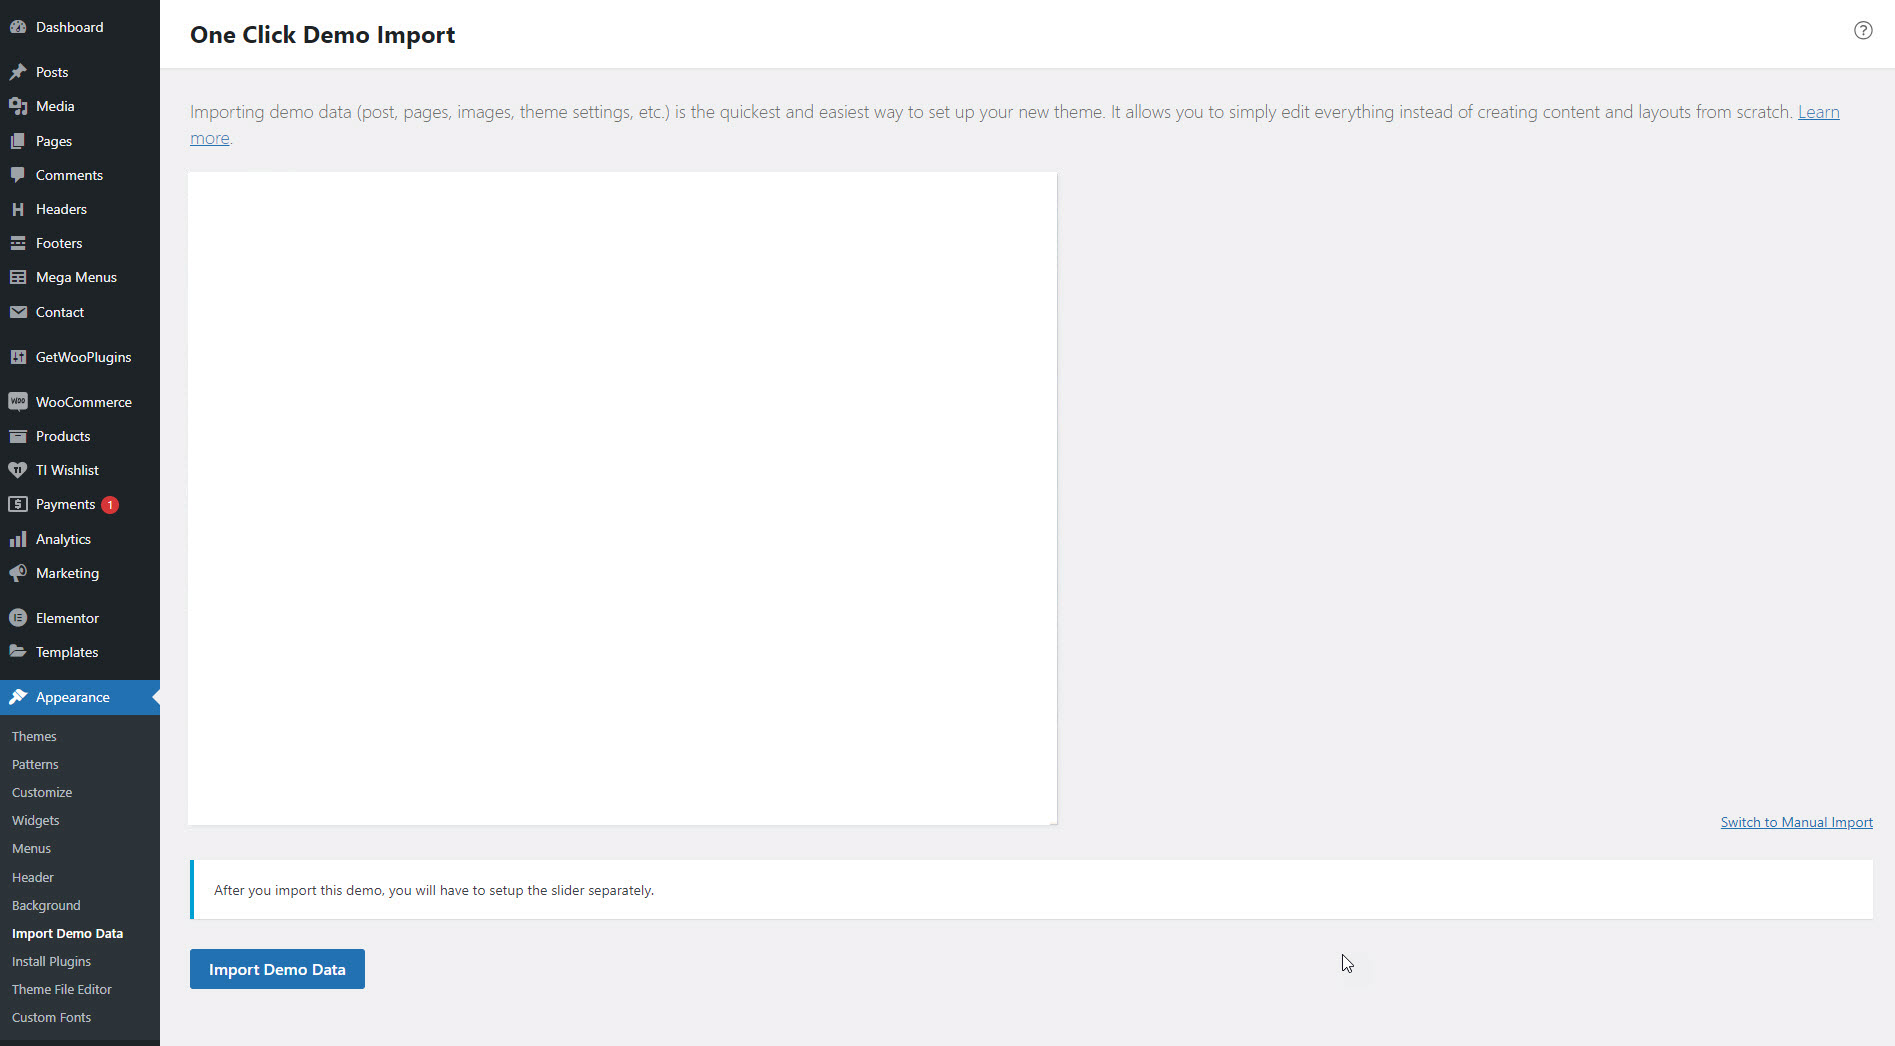
Step 4:Navigate to the Appearance > Import Demo Data
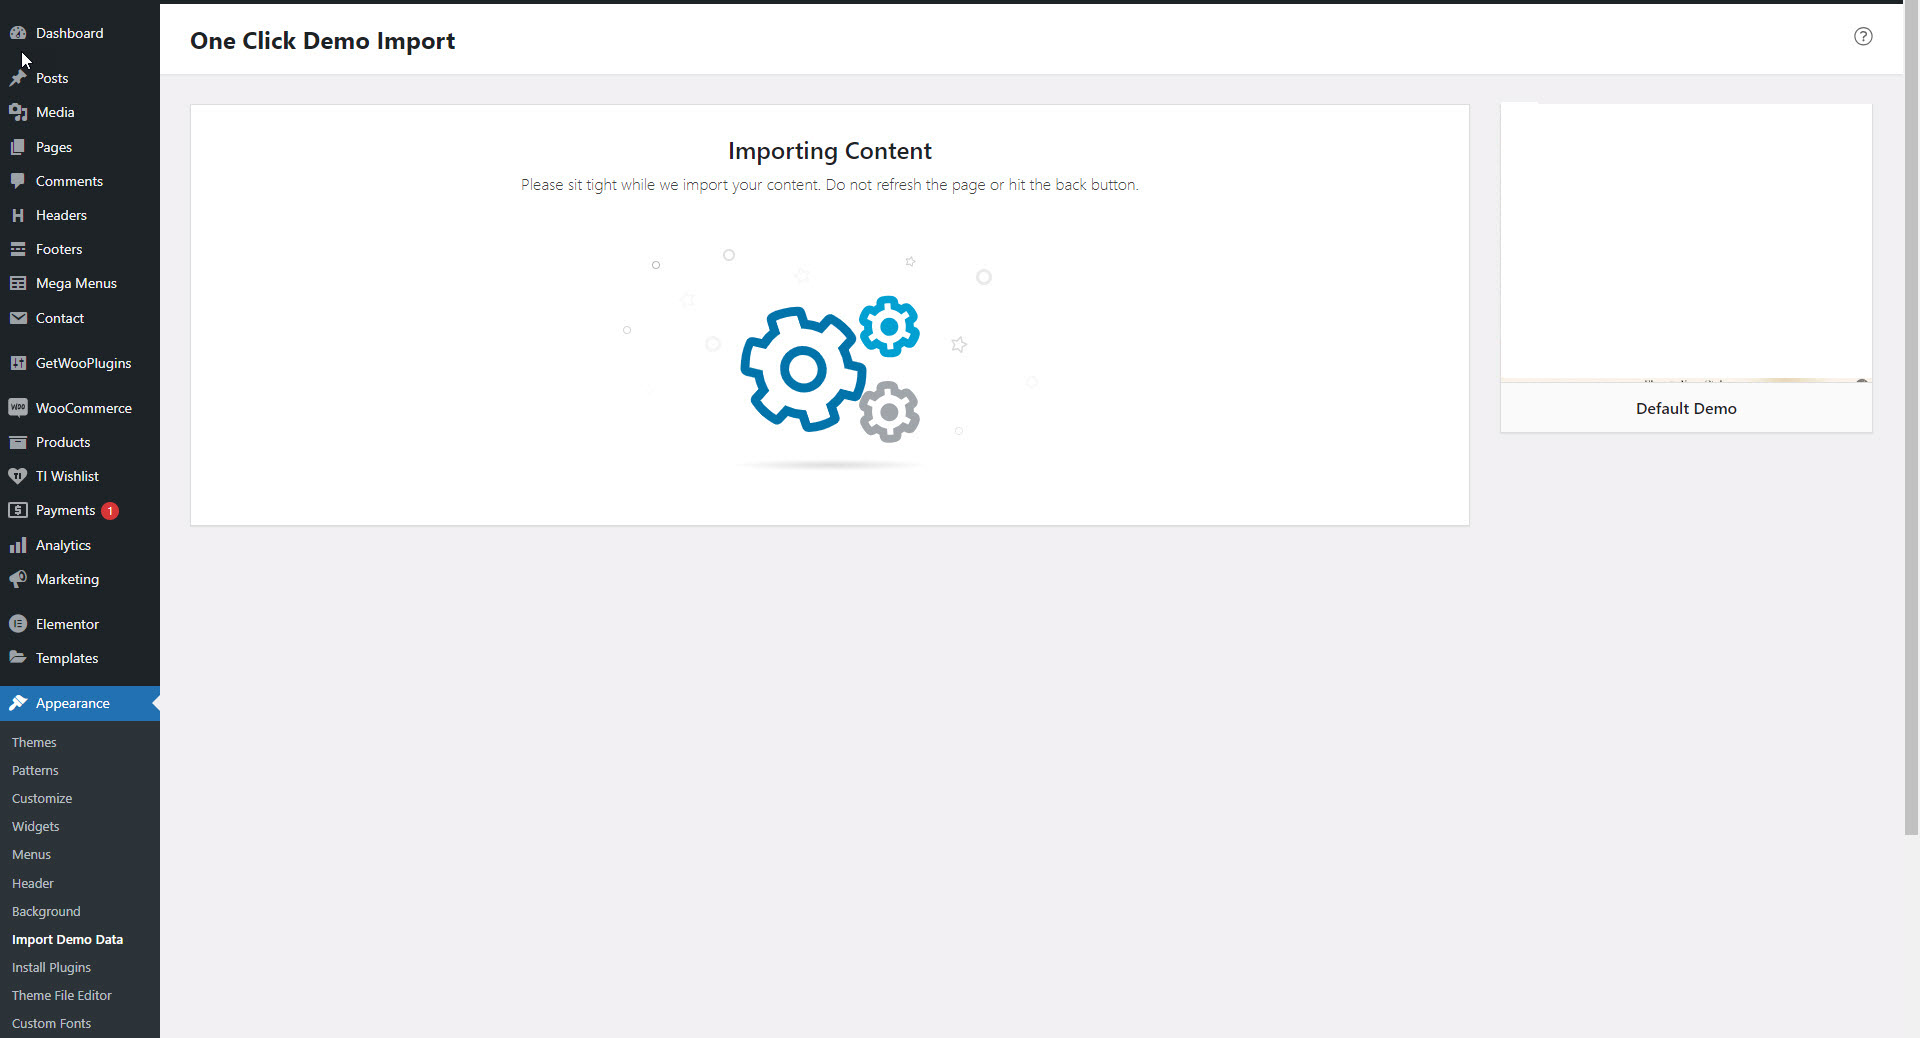
Wait for the Import to Complete: Depending on the size of the demo content and your server’s speed, the import process may take some time. Be patient and wait for the process to complete.
Verify the Import: After the import is finished, verify that the demo content has been imported correctly by checking your website.

Now you can navigate to Settings > Permalinks > Common Settings Under Common Settings click on the Post name radio button scroll down to the bottom of the page and click on ‘Save Changes’ button
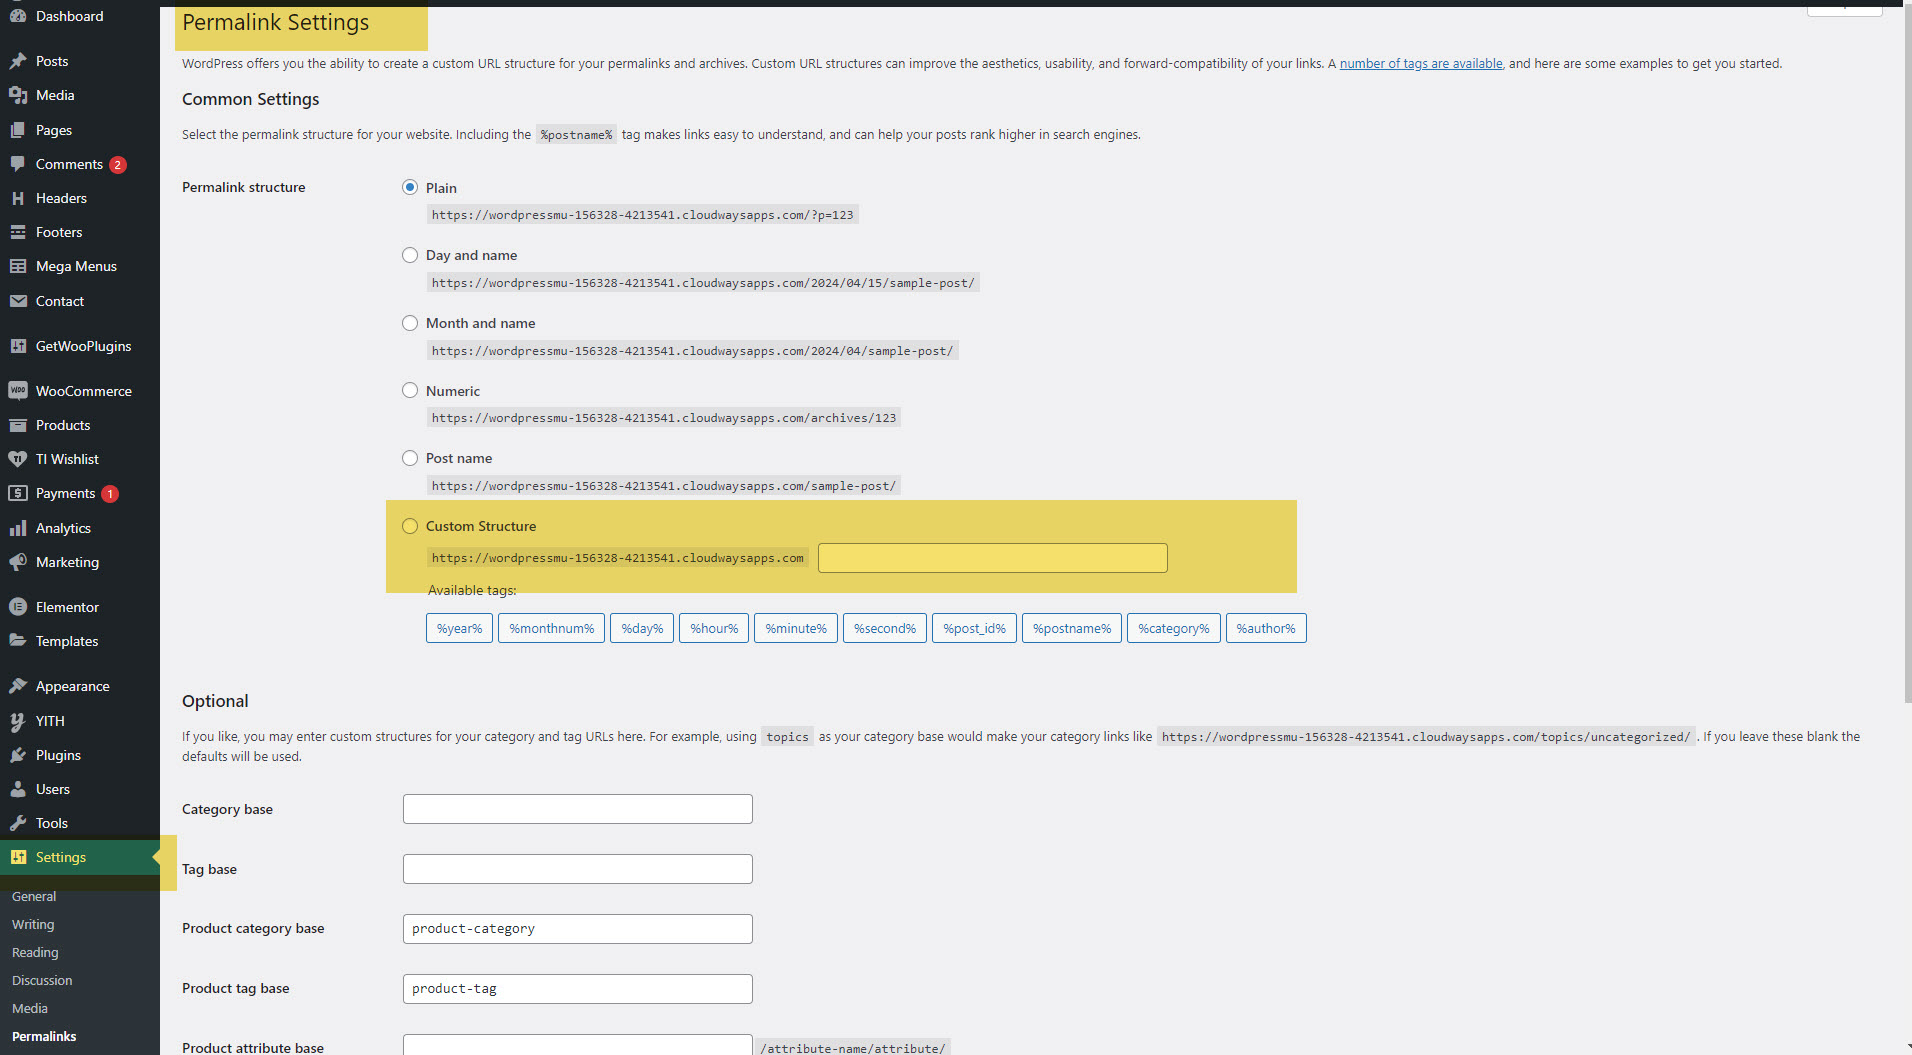
Note : Your hosting provider should have set up the web servers with the necessary configurations for the Pretty and Almost Pretty Permalinks to work correctly. If they are not, then you need to contact your hosting provider.
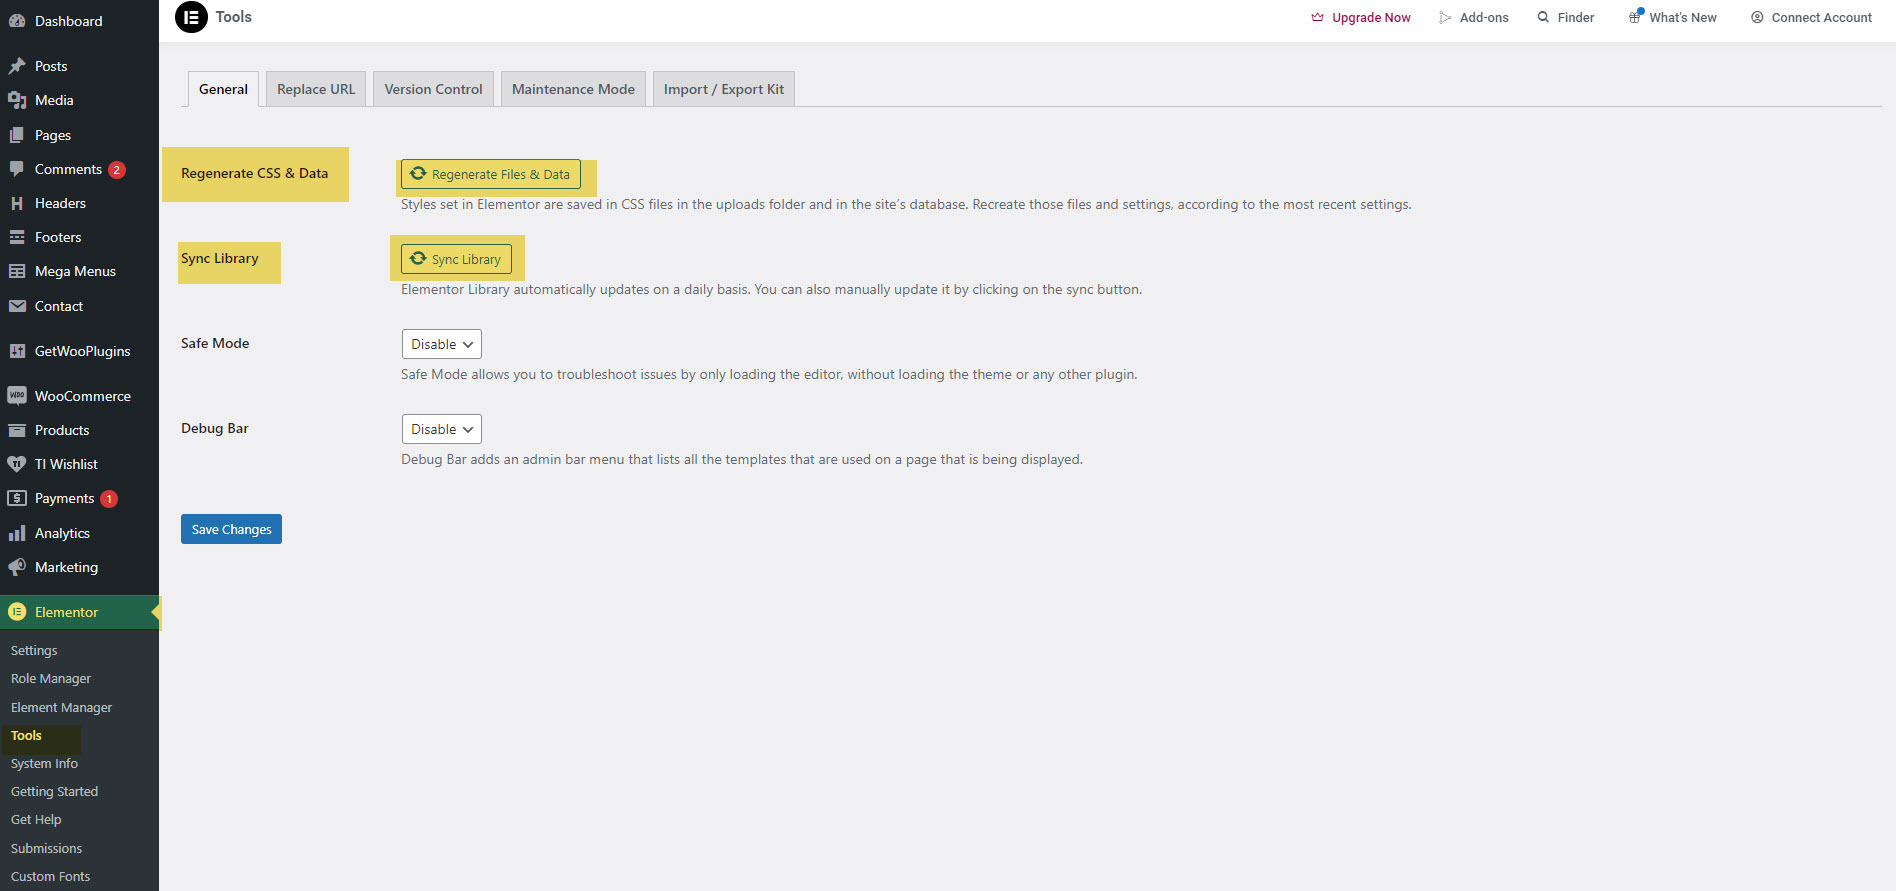
Go to Elementor>Tools> General > Click Regenerate Files & Data and also Sync Library