Sometimes issues that should not normally exist on your webpage are simply because of your own cache and can be quickly removed by clearing the cache out.
There are three types of caches that may affect how your website is performing. These caches are Browser Cache, Plugin Cache and Server Cache.
Please read below to learn how to clear each type of cache.
Browser Cache : this is cache stored by your browser to allow your page content to load faster.
Plugin Cache : this is cache specifically from a 3rd party WordPress plugin.
Server Cache : this is cache imposed by your hosting company directly from your server.
Your speed test report will likely have multiple recommendations for improvement. However, most of that is technical jargon which is hard for beginners to understand.
Learning what slows down your website is the key to improving performance and making smarter long-term decisions.
The primary causes for a slow WordPress website are:
- Web Hosting – When your web hosting server is not properly configured it can hurt your website speed.
- WordPress Configuration – If your WordPress site is not serving cached pages, then it will overload your server thus causing your website to be slow or crash entirely.
- Page Size – Mainly images that aren’t optimized for web.
- Bad Plugins – If you’re using a poorly coded plugin, then it can significantly slow down your website.
- External scripts – External scripts such as ads, font loaders, etc can also have a huge impact on your website performance.
Now that you know what slows down your WordPress website, let’s take a look at how to speed up your WordPress website in the next tab “caching plugin”.
Step 1: Log into WordPress Admin Area
Log into the WordPress admin area of your site using admin credentials.
Step 2: Navigate to Plugins Section
In the left bar, click on Plugins, and then on Add New.
Step 3: Install and Activate Breeze WordPress Cache Plugin
Locate the plugin via the search bar. Search for Breeze – WordPress Cache Plugin. Once you have located the plugin, install it.
Once the installation finishes, click the Activate link.
Step 4: Configure Breeze Cache Settings
The steps mentioned here can be useful for you to verify Breeze settings and to gain additional knowledge about some of its advanced features (i.e. CDN, purge cache, database optimization …) Click Settings in the left bar and in the drop-down, click Breeze.
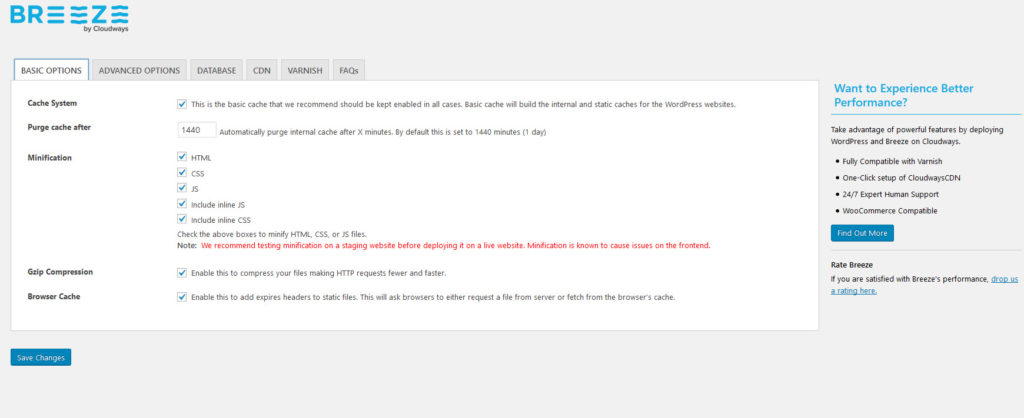
Basic Options
- On the Breeze settings page, you will see a few tabs. The Basic options tab will be open by default.
- Purge cache is set to 1440 minutes (24 hours) by default. If you wish, you can change this duration to suit your cache purge requirements.
- For Minification, it is recommended to keep it unchecked unless it’s absolutely necessary. We recommend you to test it first on
your staging website before using it on your live site. - We advise that you keep the GZIP Compression option enabled. However, you can uncheck this option if you have already enabled
GZIP compression on the server through other means such as via htaccess.
Sometimes checking Inline JS and Inline CSS might cause some issues in the site, in such cases, you can just uncheck those 2 checkboxes.
Else if there is no issues in the site, you can keep them checked.
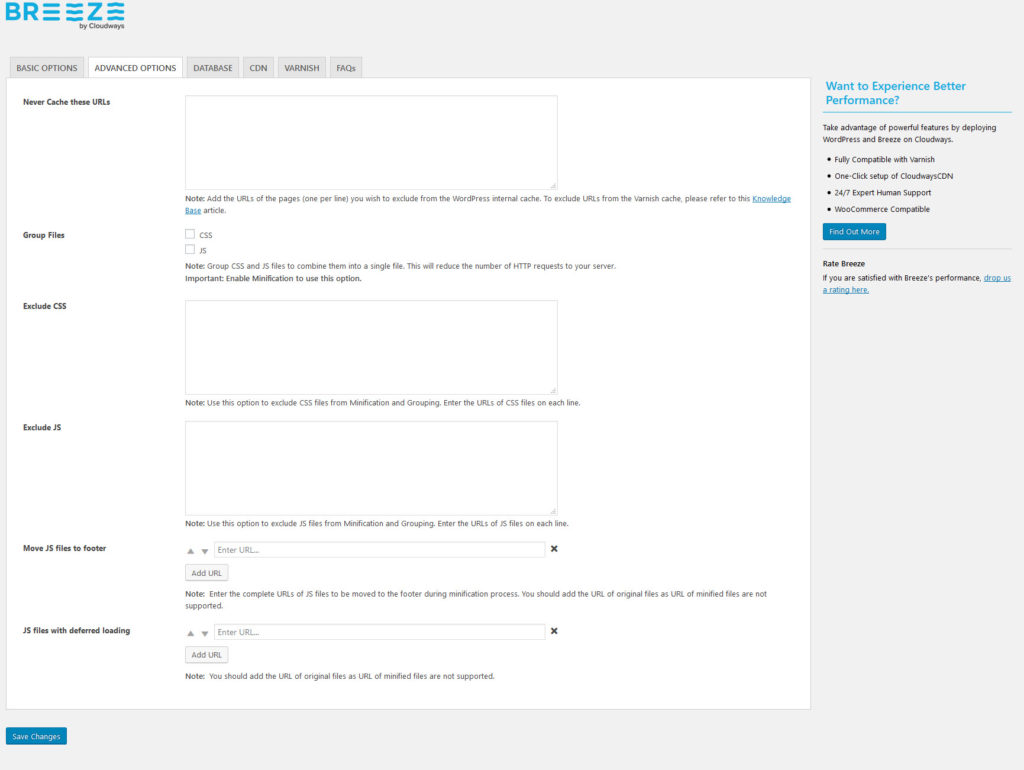
Advanced Options (Optional)
For many users, the options in this tab do not require any configuration and we suggest that all sub-options should be left unchanged. However, in case you wish to modify these options, here is the explanation for the options:
- You may want to exclude specific URLs from plugin’s cache. If that is the case, you can add them in the
Never Cache these URLs field. (Note: If Varnish is enabled on your Platform, we suggest excluding the URLs from the Varnish as well). - If you are using minification, you may select CSS and/or JS under the Group Files option to combine your CSS/JS files into a single file.
- You may also want to exclude certain CSS and JS from minification and grouping. You can add them in the separate fields to exclude your CSS/JS files as shown in the video.
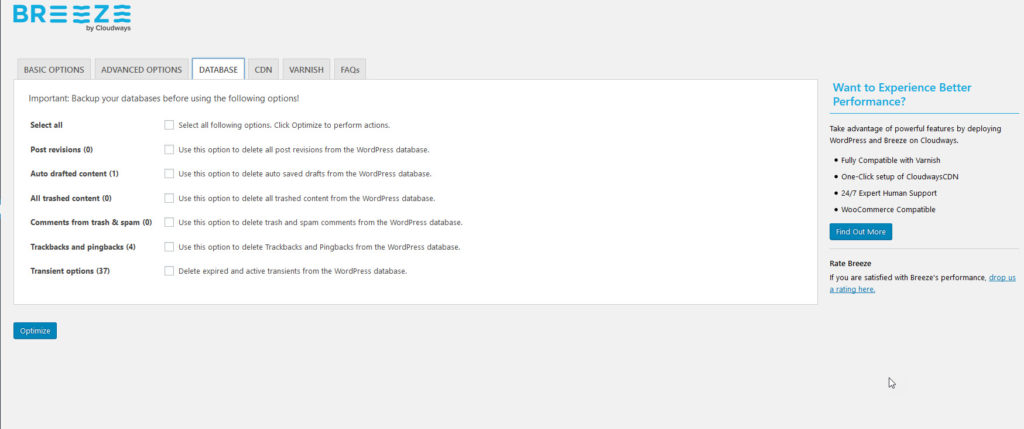
Database Optimization
Options discussed below can be set according to your requirements. For example, you can decide which type of content needs to be cleared from your WordPress database to keep it optimized.
Database optimization options include Post revisions, Auto drafted content, trashed content, comments from trash and spam, trackbacks and pingbacks, and transients. These options will keep unnecessary data off your application database, thereby decreasing the database size and
improve overall website performance.
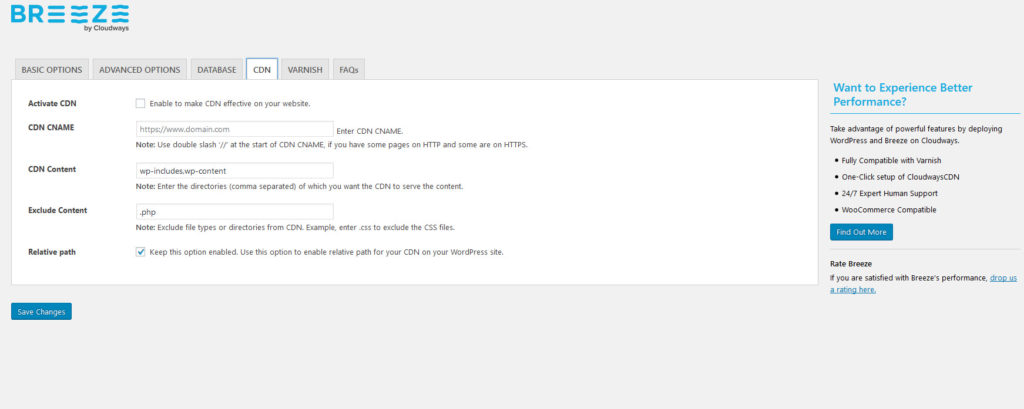
CDN (Optional)
Breeze WordPress Cache Plugin allows you to configure a CDN with your website. The following options are available for configuration:
- CDN Root URL: Here you can specify the URL of CDN that you are using or planning to use with your WordPress website.
If you have some pages on HTTP and some on HTTPS, you should begin the URL with a double slash ‘//’ (e.g.: //www.cdnurl.com). - CDN Content: Here you enter the subdirectories for which you wish CDN to serve content.
- Exclude Content: If you want to exclude content (static content such as CSS/JS/images) from CDN,you can list them in this field.
- Relative Path: We recommend that you keep this option enabled. This will enable the relative path for your website.
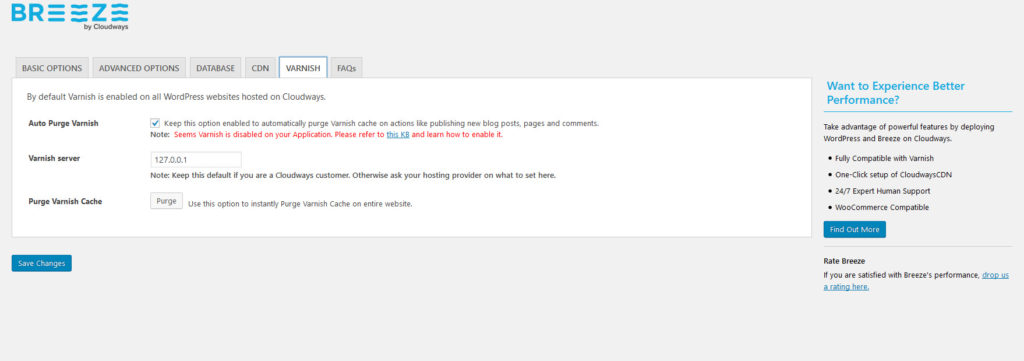
Varnish Options
The last tab that you can configure is Varnish. By default, Varnish is enabled on all fresh WordPress deployments. To manage Varnish settings. We recommend that you keep the Auto Purge Varnish option enabled at all times.
Step 5:
Now after configuring all those options, load all the pages in your theme one by one, so that the cached files are generated.
Now again check the google page speed of the theme and it will be increased much better.
Need to increase the performance more?
- Theme Speed Most of it depends on site images. If images are properly optimized you can increase the site performance.
There may be many bigger images that are not optimized and you can optimize all those images using many optimizing plugins like imagify, etc. - Check if the server is configured as per the theme requirement.
- Removing unwanted plugins, themes added in your site.
- Finally always update the theme, plugins and wordpress to the latest version.